radio free fedi blog

howTo

( please do not follow this account, this is for long form reading, expanded masto posts and archive reference. Please follow and interact with us at @radiofreefedi@musician.social where we announce and link the material here)

#howTo #help #production #tips #submissions #resources #audio

[Friend of the station Jamie Hill @hilljam@mastodon.social is an artist, engineer, producer and all around helpful sort. Check him out in the fedi for his many projects including a studio and production tips mail list and his amazing musical works with @shannoncurtis@mastodon.social]

When you're prepping a song for self-release, you want to make sure that it doesn't have any levels that go over 0.

The problem with this is that digital audio can contain momentary transient information, which you don't really hear, but the peaks of which can make you bring your master volume fader down so far that your song ends up sounding really quiet.

The solution? A limiter on your master bus!

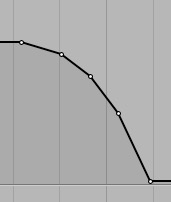
A limiter is a “safety valve,” which contains those random transients for you, allowing you to bring the overall level of your song up to a much healthier level. You can buy fancy limiters costing hundreds of dollars, and if you're serious about doing proper diy mastering then you will eventually want to get a fancy limiter. But to start with, you can use the built-in limiter in your DAW, and it will help a lot.

The limiter should be the last thing on your master bus affecting the sound — so, put it after any other plugins on your master bus (with the exception of metering plugins. Metering plugins should go after the limiter, so that its effect on the sound is taken into account in the metering). Here's how to set the limiter:
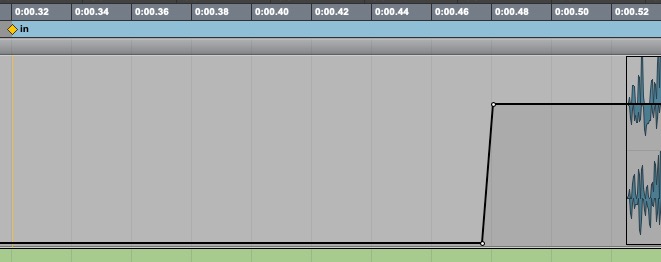
  • Ceiling: -0.1dBFS
  • Release: 5ms

At the simplest level, that's it! Limiters have instantaneous attack; if you set the release to be nice and fast, so it gets in and gets out quickly, it will operate essentially transparently, as long as you're not pushing it too hard. You can push even a basic modern limiter into 4-5 dB of limiting before you start to hear it; if you push it harder, you may start to hear it having negative effects on your mix, so be watchful for that.

If you need help with this or other mastering-related topics, you can reach out to me through https://deptofenergymgmt.com and I'd be happy to help.

( please do not follow this account, this is for long form reading, expanded masto posts and archive reference. Please follow and interact with us at @radiofreefedi@musician.social where we announce and link the material here)

#howTo #help #production #tips #submissions #resources #audio

[Friend of the station Jamie Hill @hilljam@mastodon.social is an artist, engineer, producer and all around helpful sort. Check him out in the fedi for his many projects including a studio and production tips mail list and his amazing musical works with @shannoncurtis@mastodon.social]

The single biggest thing in prepping your own song for release is making sure the beginning and ending are properly “topped and tailed” — i.e., faded in and out. Here's how to do that!

The basic idea is that you want to make sure that you're automating the beginning and ending of your song so the resulting waveform when you bounce your song starts and ends at -∞ (a volume of negative infinity — i.e., no sound).

Why? Because if you don't, then your song might make a click or pop at the beginning and/or the end when someone plays it, and that's not good.

What I do is I put a Gain or Trim plugin after the limiter, and automate that. That way if I do a fade or something it's capturing the sound of the entire master bus and fading that, as opposed to when you draw a volume automation on the master bus, which is pre-inserts — meaning that as you automate the volume down for a fade, you're gradually pulling the song out of the master bus compressor and limiter etc, meaning that the sound of your mix CHANGES IN THE FADE 😱 Sometimes this is cool! But generally I just prefer to have my master bus sounding the way it's sounding, and then do fade-ins and fade-outs of that.

If the preceding paragraph makes your head hurt, then just automate the volume on your master fader, it's fine.

For the fade-out at the end of the song, it's nice to draw a little curve sometimes, especially for short fades, like when a song comes to a distinct ending but there's a reverb tail or room sound fading away at the end. The curvature makes fades in those situations sound less overt / more natural. Here's an example of how to draw a natural-sounding fade on a song that ends with a reverb tail, which as you can see takes place over about three bars. For reference, 3 bars at 120bpm is 6 seconds.

a multipoint drawn curve example for a fade out of a song

For the fade-in at the beginning of the song, almost all of the time it's just a very quick “up from -∞ to 0” a little bit before the first thing in the song that makes sound. Like this:

a 'quick up' fade-in envelope example

Note the time scale here. We're really zoomed in!

As you can see, the first audio in the song in this example is at 0:00.52 (point five two seconds).

I generally put the “In” marker 0.2 seconds before the first thing in the song that makes sound, because sometimes players can take a moment to buffer, and if the first bit of audio is at 0:00 it can get cut off. So in this example I've put my “In” marker at 0:00:32.

And then the “fade up from nothing to 0” is only a couple milliseconds long and very abrupt. You can see that I've put it a little ways out from the downbeat, so there's a little “air” before the song starts, because I've learned that that helps the first note feel more impactful. If you try to get the fade-in right up to the audio it can lose something.

If you need help with this or other mastering-related topics, you can reach out to me through https://deptofenergymgmt.com and I'd be happy to help.